Before you start
This tutorial assumes that you already have a Counselling Buddy account and that you have already created the client’s profile, and your session types. This guide will work without a session type, but we recommend creating them because they allow you to manage your communications more effectively, and to send different emails for each session type.
This tutorial also assumes that your Notification settings are set to ask you whether you’d like to send a confirmation email each time you schedule a session. If you have set it to “Send every time” or “Don’t send” the confirmation email section of this tutorial will not look the same for you (it will either automatically send as soon as you save the session, or not send at all accordingly).
- If you haven’t already, create a client profile for the person you would like to schedule a session with.
- We recommend setting up your session types before scheduling appointments. This is not mandatory, but will make the things Counselling Buddy can do for you more clever.
Video walkthrough
Visual learner? The below video will walk you through the steps you need to take to book a session, and show you how to send your client a confirmation email. If you’d rather read through the steps, please scroll past the video.
How to schedule a session and send a confirmation email
Scheduling a session
To schedule a session, the first thing you need to do is log in to your Counselling Buddy account. Scheduling is used to help you keep track of your hours worked, when you’re seeing each of your clients, and provides a session history record in each of your clients’ profiles. They are also how Counselling Buddy knows when to send session reminders to you and your clients.
Scheduling a session is simple, by following the below steps.
- Log in to your Counselling Buddy account (if you haven’t already)
- Navigate to the Session Calendar page
Choosing your calendar view
Once you reach your calendar page, there are a few ways that you can schedule a session. The way that most people find easiest is to click into the weekly view of the calendar (by default, the calendar opens in the Month view).
Weekly view can be toggled by clicking the Week button above your calendar widget (to the right hand side). You can
stay in the Month view if you would prefer.
Please see the below sections, with the instructions for each of the different views.
There is also a Create Event button, which works the same way no matter the view you are in.
Week view
Once you have clicked on week, if the currently displayed week isn’t the week you need, you can use the Today,
Last and Next buttons above your calendar to the left to navigate between calendar pages.
Once you are on the correct week, you can schedule a session by following these steps.
- Scroll to the timeslot you wish to schedule your session for.
- Click on the relevant time slot. This will open the session scheduling window. You can also click and drag over the time you wish to schedule for if you prefer.
Once you find the time slot that you need, you can click on it, or drag over it (to select the time segment that you would like to schedule a session for). This will open the session scheduling window.
Month view
If the date you wish to schedule a session for is not within the currently displayed month, you can use the Today,
Last and Next buttons above your calendar to the left to navigate between calendar pages.
Once you are on the correct month, you can begin scheduling a session by clicking on the day you wish to schedule your session for. This will open the session scheduling window.
Create Event Button
Clicking on the Create Event Button will open the session scheduling window, with the session start date for the current date &
time, and the end time set to 1 hour later. This can easily be modified within the session scheduling window.
Entering the session details
Once you have followed one of the above choices, you should see the session scheduling window, which should look like the below image.
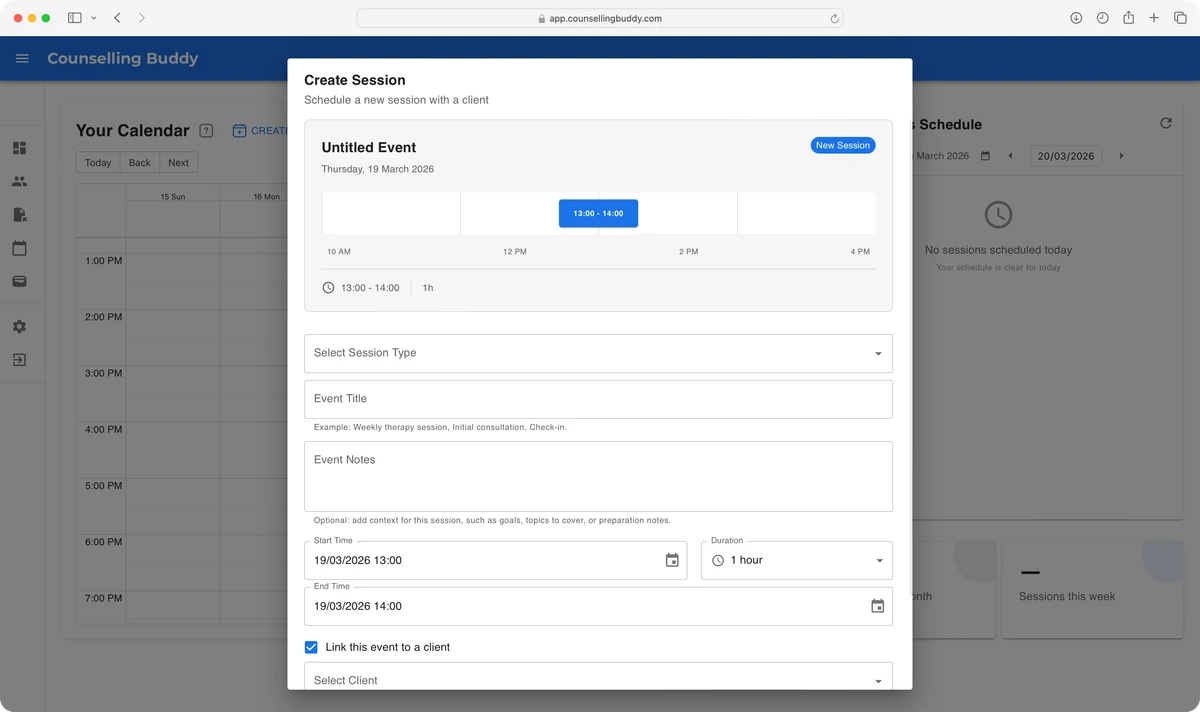
There are 3 key pieces of information to make this work. These are the session type, the session title, and the client name.
Selecting a session type provides the name of the session for the confirmation email, as well as the email templates for both the confirmation email, and any reminder emails that will go out ahead of the session.
You are now ready to click Save Event.
Sending a confirmation email
Once you click the Save Event button, you will see the below prompt for confirmation. This is the system confirming whether
or not you want to send the confirmation email to your client. For this guide we will click yes, then confirm.
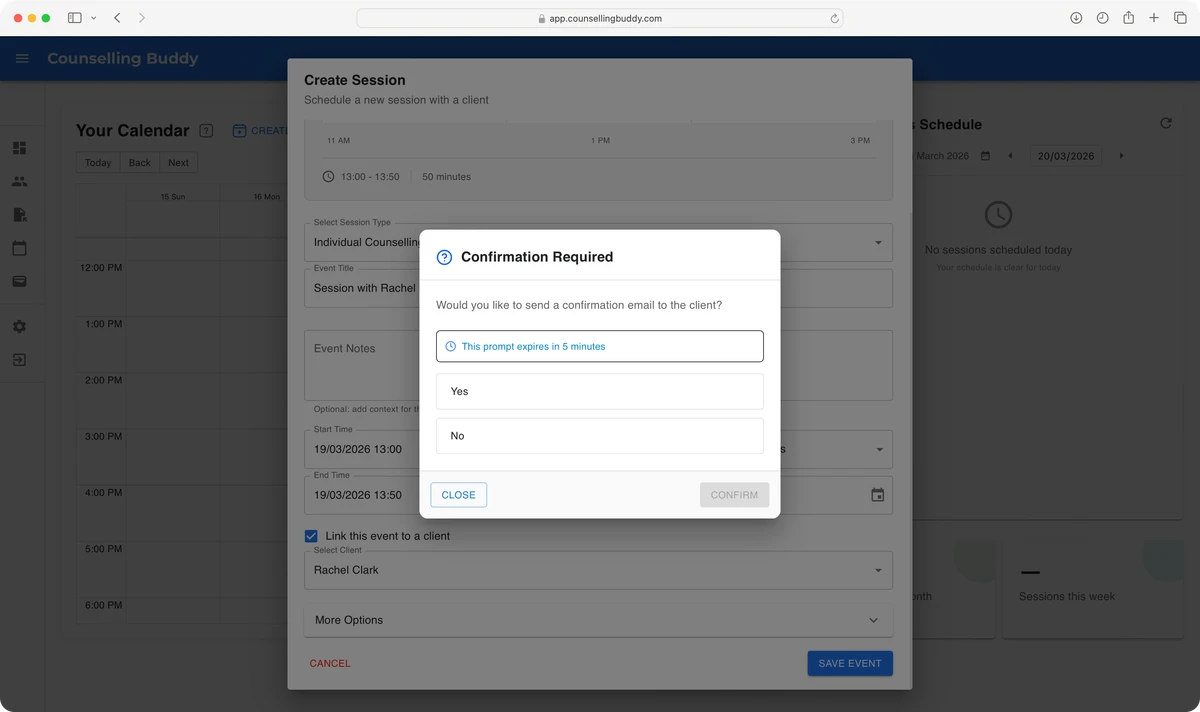
Once you have clicked yes, then confirm, the client will be sent the confirmation email.
What the client receives
Once you confirm that you want the client to be sent a confirmation email, they will receive an email that is written based on your confirmation template attached to the session type that you used for this session.
The below image shows the email that was sent when scheduling the session in this guide.

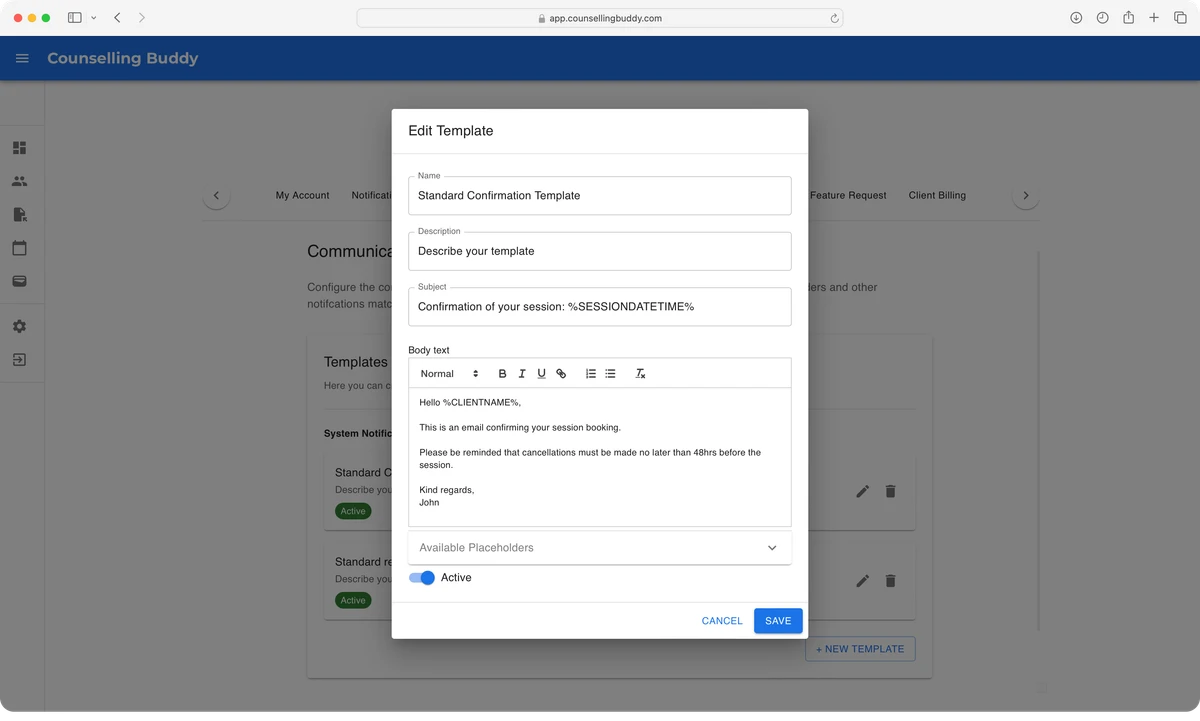
The content of this email was pre-determined from the Confirmation email template for the session type.
The below image shows the template this email is based on. Both the blue strip with the session details, and the email signature information are automatically added by the system, since it is a confirmation email. Cancellation emails use the same base template, but with a light red instead of the light blue.