Before you start
This guide assumes that you already have a Counselling Buddy account, have set up Billing and Payments and want to manually send a payment link. If you want payment links to be sent automatically when you schedule a session, please look at our getting started with Billing and Payments guide which will walk you through setup, and how to use payment links for auto billing.
Video walkthrough
How to create a payment link, and send it to a client
Step 1: Navigate to the Billing Dashboard
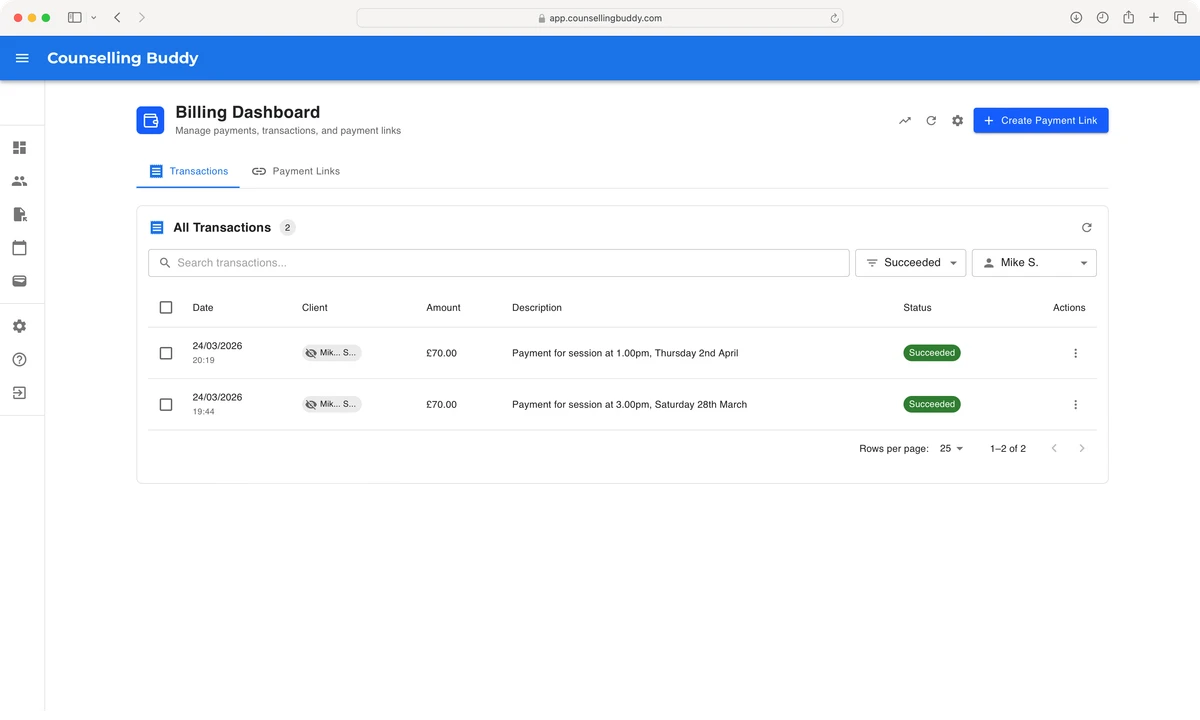
The first step to manually sending a payment link is to navigate to your Billing Dashboard. You can do so by clicking the wallet icon on the left-hand menu inside Counselling Buddy. You should then see a page similar to the one pictured below.
You can also see your existing payment links by clicking the Payment Links button to switch to the payment links tab.
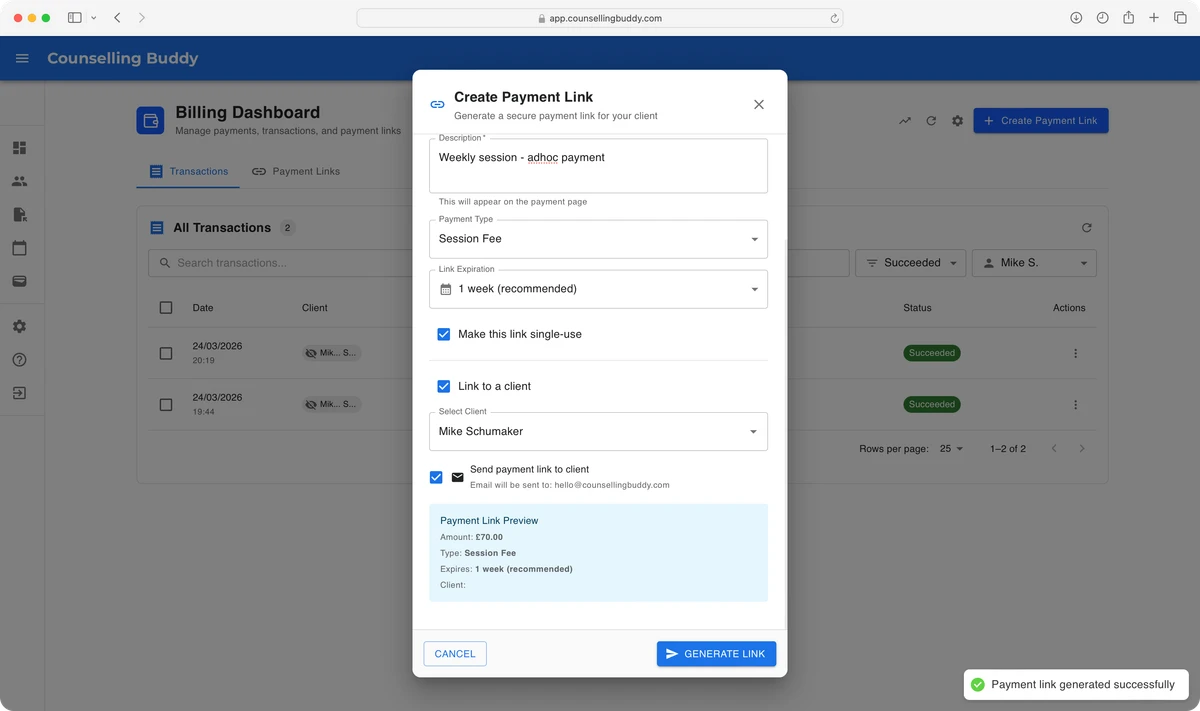
Step 2: create a payment link
To create your payment link, click the Create Payment Link button in the top right of the page. This will open the
create payment link popup window, as pictured below.
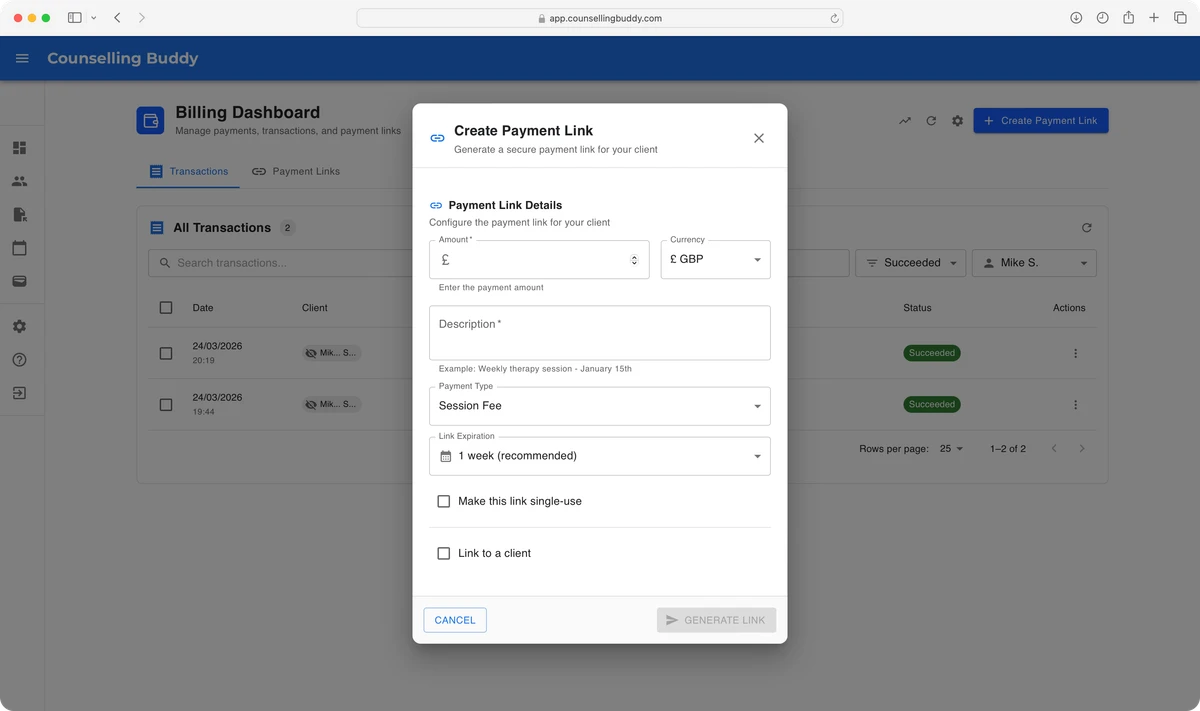
Using the fields in this popup window, you can enter the amount to be paid, a description that will be shown both in your billing dashboard (under the payment links tab) and on the payment page.
You can also choose whether you want the link to be single-use, when you would like it to expire (if at all) and whether you would like to link it to a client. If you link it to a client, you will also have the option for the link to be automatically emailed to them.
Good to know
We generally recommend that you:
- Set the expiry to 1 week, allowing enough time for your client to make the payment, while ensuring the link doesn’t remain active longer than necessary.
- Set the link to single-use if you only expect one payment, to prevent accidental duplicate payments.
- Link the Payment Link to the relevant client whenever possible. Otherwise, the client will be asked to provide their name and email address during payment.
Whilst possible, we generally do not recommend using a single Payment Link for all session payments.
Step 3: Send the link to your client
Once you have entered the details for the payment link you would like to create, and selected a client, you will be presented with the option to have the link emailed to the client, as pictured below.
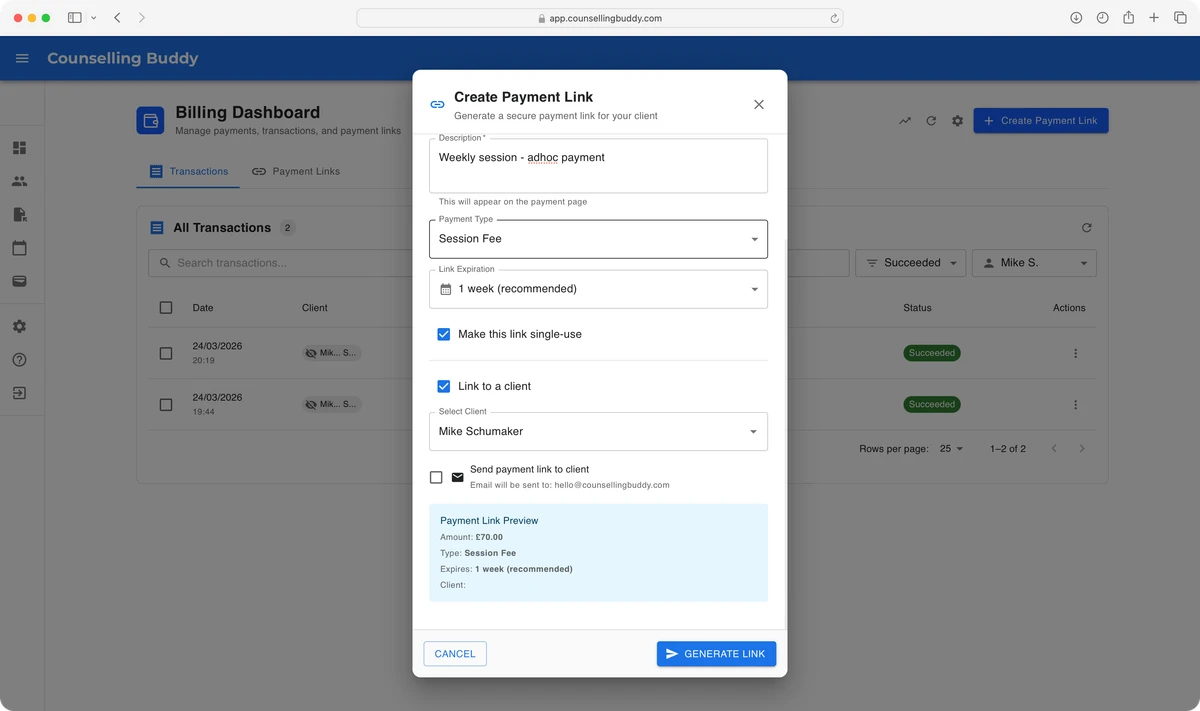
If you want the client to be sent an email with the payment link, tick the checkbox next to Send payment link to client
then, once you are happy with the details you have entered, click the Generate Link button.
Shortly after clicking the Generate Link button, you should see a message in the bottom right hand corner of your screen,
confirming that the payment link was created successfully, as pictured below. If you ticked the Send payment link to client
checkbox, this also means the email was sent successfully.
Step 4: Viewing & Managing the newly created payment link
Now that you have created your payment link, you should also see it in your Billing Dashboard, under the payment links tab.
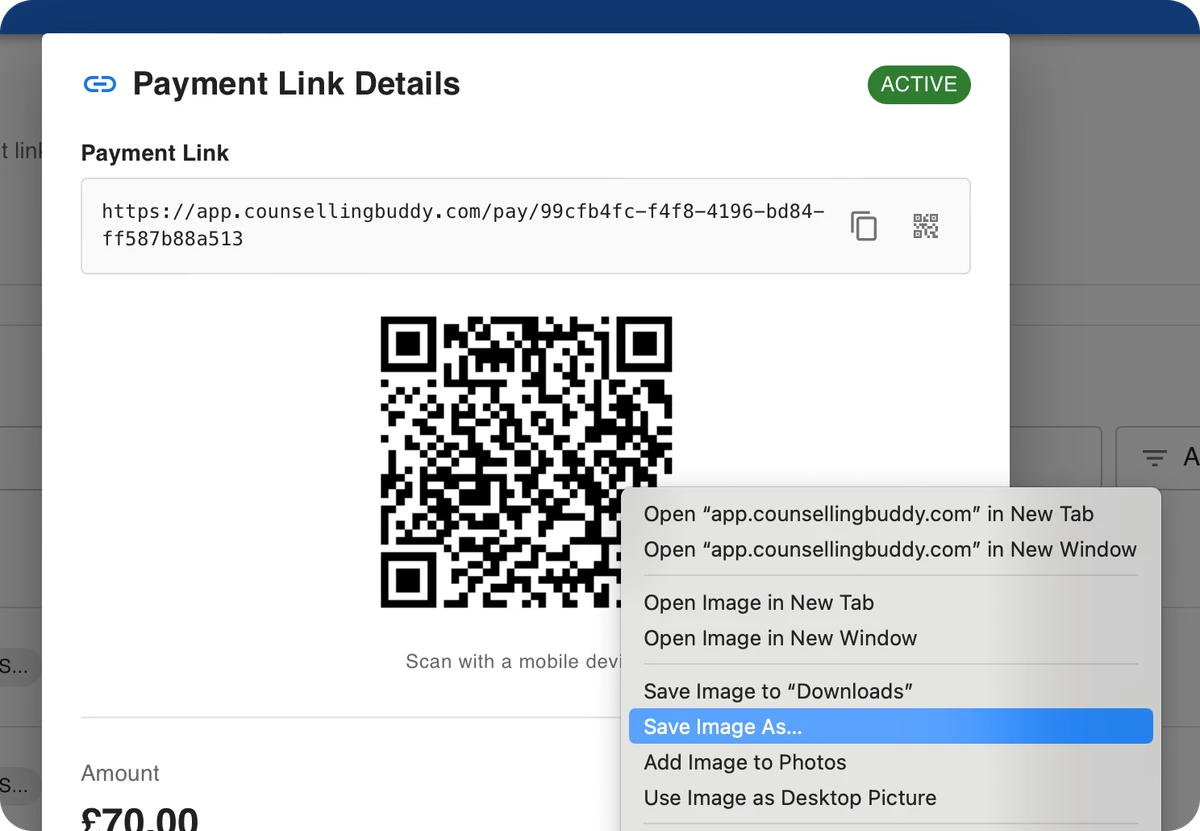
You will see a table showing all your payment links. Clicking on the row for the payment link you’ve just created will open a popup window showing its details, as pictured below.
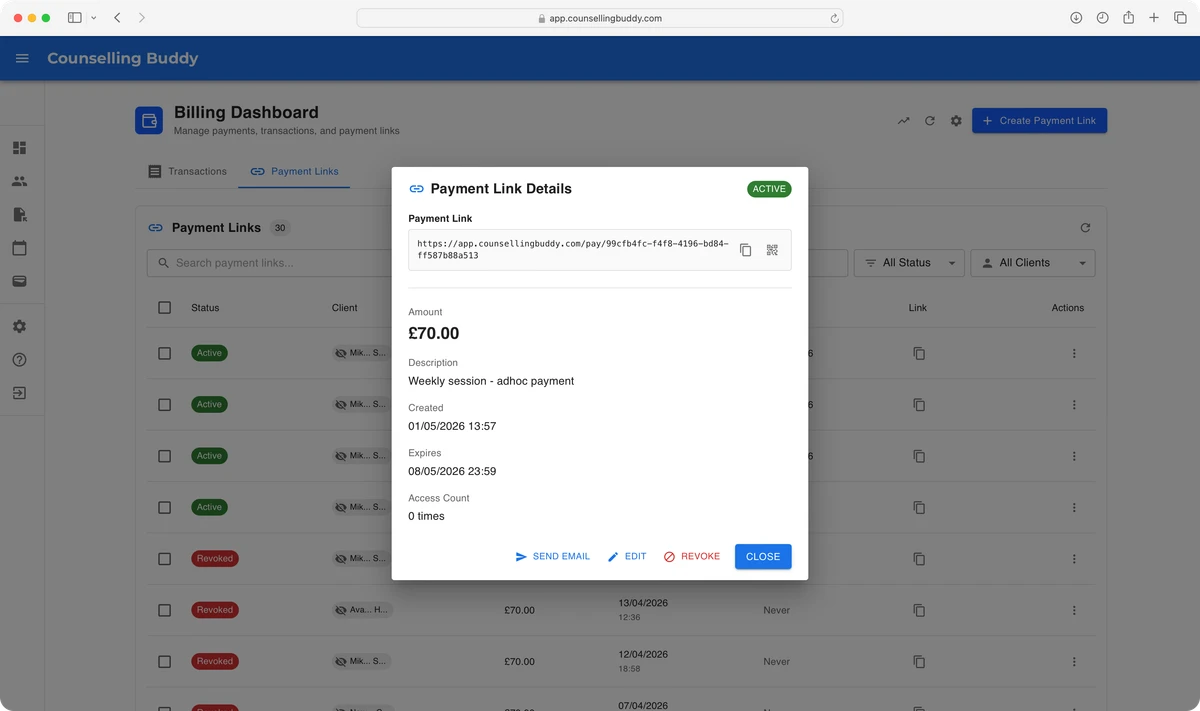
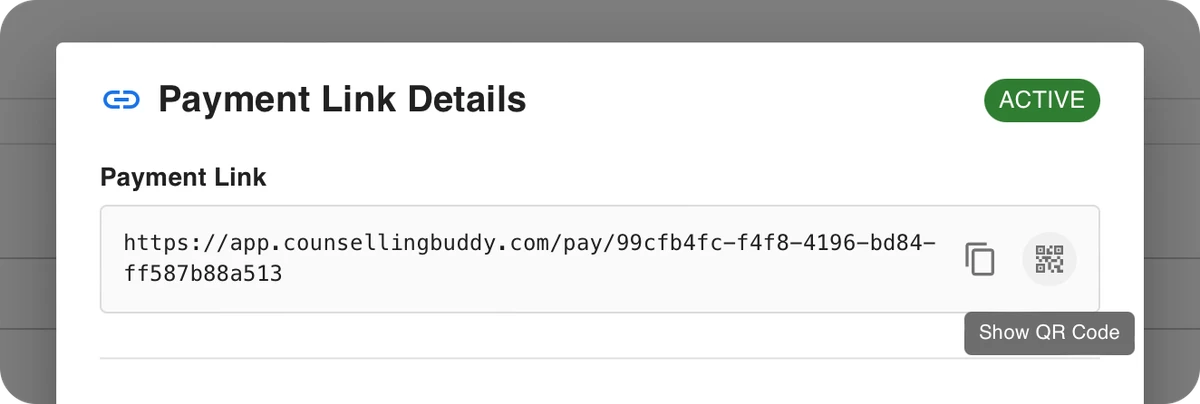
This popup lets you do a few things. The first is seeing the payment link, at the top of the popup. To the right of the payment link, there are two buttons. Using the first button, you can copy the payment link.
The second button, as pictured below, gives you the option to display a QR code which can be scanned to open the link.
Clicking the above Show QR Code button will show a QR code which can be scanned to open the payment link, as pictured below:
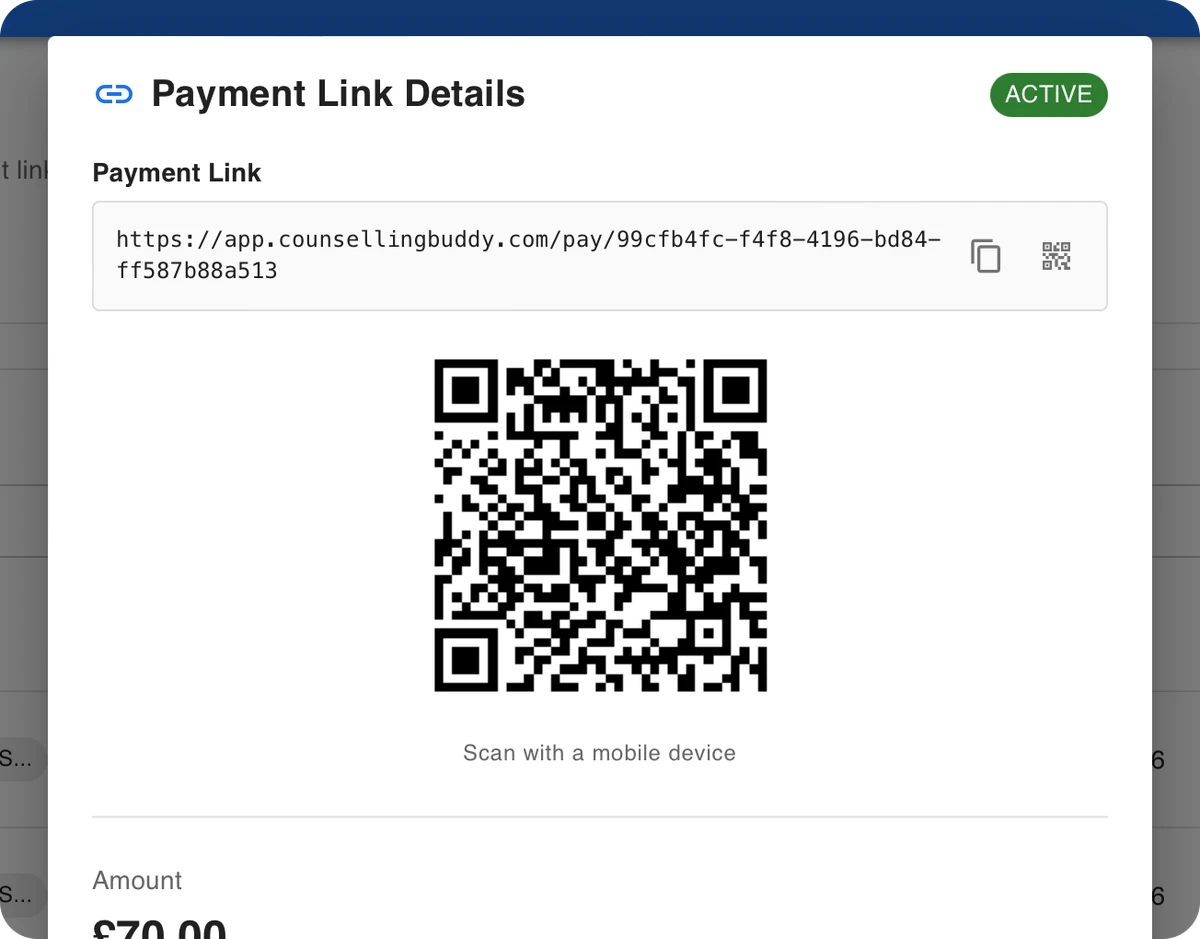
By right-clicking on the QR code, you can download it, as shown below. The below screenshot was captured on Mac OS, so this may look different depending on what device you use.
The saved picture can then be attached to an email, printed, or shared however you’d like.
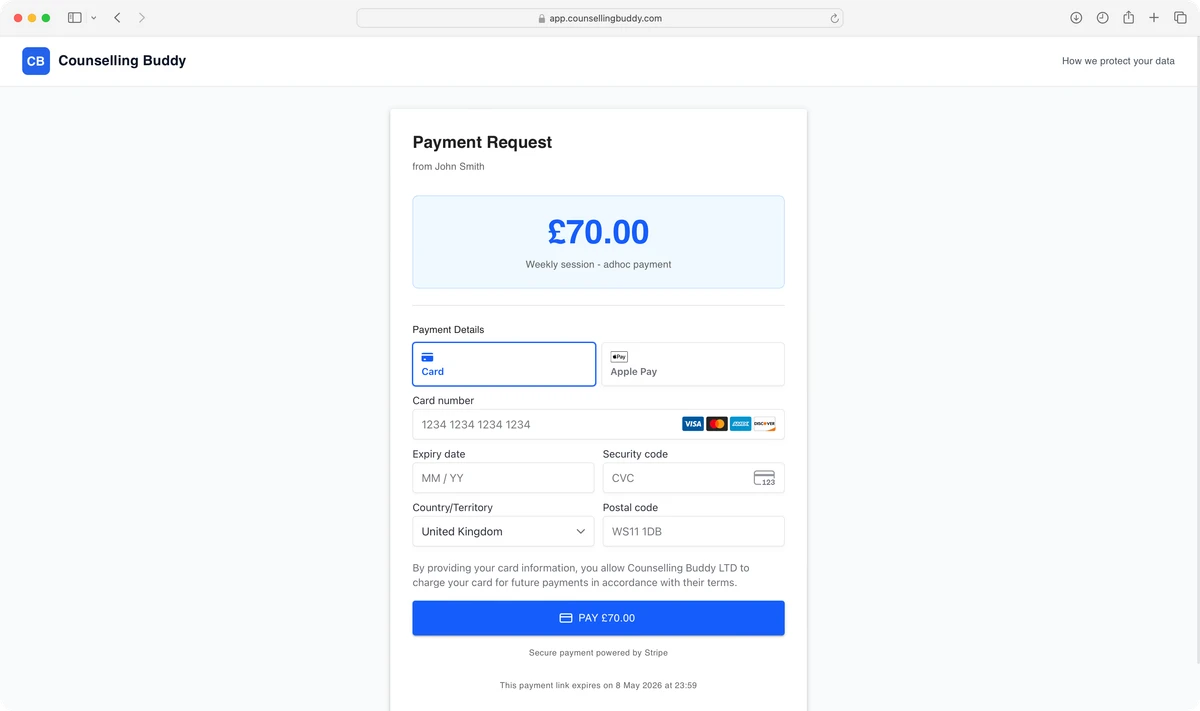
What your client sees
Payment page
The page your client sees when they open their payment link to make a payment.
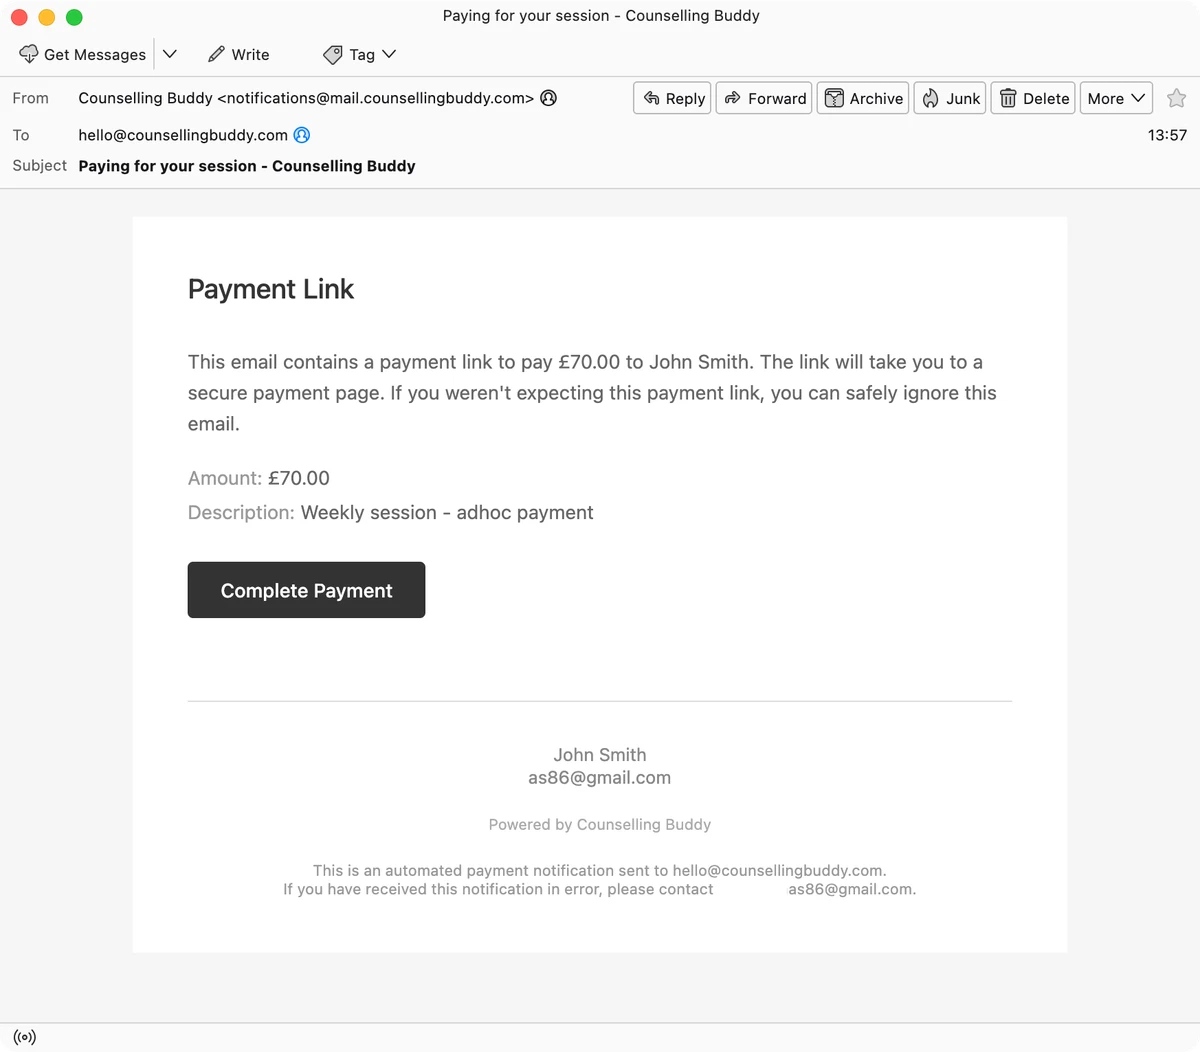
Payment link email
The email Counselling Buddy sends to your client, if you specify that you would like an email to be sent.